Bamboo is a long established craft of Assam evolved through centuries of cultural and functional needs. The indigenously grown bamboo is found in abundance in the hills of north east and is found to be a major industry of Assam. Apart from its use in making daily products like fish traps, winnowing fans, sieves, rain shields, low stools and hand fans etc the Muli bamboo is split into half through its cross section to provide two layers. Such layers are either used for making walls and floors of the houses. The outer layer which is stronger is used for creating the outside walls of the houses while inner soft layer is used to make partitions inside the house. The craft of making bamboo mats with splitting process provides employment to many artisans in Assam. The bamboo mats are very popular in the cities like Kolkata, Guwahati and Agartala.

Enamelling or minakari can be described as the art of colouring and ornamenting the surface of metals by fusing over it brilliant colours that are patterned in an intricate design. Enamel or minawork was a notable Mughal innovation in metalcraft. Mina was popular both with the Mughals and the Hindu princes of Rajasthan where it was used for enriching jewellery and for creating other precious objects. Using a variety of colours the craftspersons ornament the surface of the metal. Gold has traditionally been used for minakari jewellery as its lustre brings out the colours of the enamels; it also holds the enamel better and lasts longer. Silver is a later introduction and is used for artefacts like boxes, bowls, spoons, and art pieces. Copper, which is used for handicraft products, was introduced only after the Gold Control Act --- which compelled the minakars to look for a material other than gold --- was enforced in India. The work of the minakar often went unnoticed as, traditionally, minakari patterns were used basically as a backing for the famous kundan or stone-studded jewellery. Several reasons were cited to explain this: the prosaic explanation was that it allowed the wearer to reverse the jewellery, while the more poetic reason was that the wearer of the jewellery was promised a special joy in the secret of the hidden design! The minakars belong to the Sonar or Soni caste of kshatriyas and identify themselves with the name of Minakar or Verma. This is a hereditary craft and the minakars seldom allow outsiders to acquire any knowledge of their craft. The process followed is long and complex and a single piece of mina can pass through many hands before it is completed. The traditional sequence starts with the designer (nacquash, chitera), and moves on to the goldsmith (sonar, swarnakar), the engraver who engraves the design (kalamkar, khodnakar), the enamellist who applies the colour (minakar), the polisher (ghotnawala, chiknawala), the stone-setter (jadia, kundansaaz), and the stringer (patua), all of whom are part of the chain that creates the finished product. However, often a single artisan performs a multiplicity of tasks. Like a miniature artist, the minakar engraves the surface of the metal with intricate designs using a metal stylus. This is then filled in with colours. When placed in a furnace, the colours fuse and harden to become one with the surface. The piece is then gently rubbed with a file and cleaned with a mixture of lemon and tamarind, which helps emphasise the brilliance of each colour. Enamel colours are metal oxides mixed with a frit of finely powdered glass; the shade obtained varies according to the amount of oxide added and the powder is suspended in water for ease of application. The colour yellow is obtained through the use of chromate of potash, violet through carbonate of manganese, blue through cobalt oxide, green through copper oxide, brown through red oxide, and black through manganese, iron, and cobalt. The brilliant red is the most difficult of colours to achieve. White and ivory, also difficult, are achieved through a mix of antinomies of potash, hydrated iron oxide, and carbonate of zinc. The minakar applies the colour according to their level of hardness, beginning with the hardest. Before the enamel is applied the surface of the ornament is carefully cleaned. In their raw form these mixtures do not always show their true colours, which emerge only when they are fired in the kiln. The average firing temperature is about 850 degrees celsius. The enamel colours are bought either from Amritsar in Punjab or from Germany or France. Enamelling was earlier practised in many centres in India, with each region specialising in its own variation of style and technique. In Lucknow the speciality of the minakars was blue and green enamelling on silver, while in Banaras the dusky rose-pink or the gulabi mina was the dominant colour. The craft was also practised in Kangra, Kashmir, and Bhawalpur. It was, however, most vibrant in Jaipur (Rajasthan) and in Delhi, and these two centres continue to create minakari pieces of excellence till today. The family members of Ram Krishan Minakar, a master craftsman and a National Award winner state that the craft of minakari has been handed down for at least four generations, if not longer. The children, too, are interested in following the family tradition. Ram Krishan's family today works with a copper and brass alloy to make handicraft items that are sold all over the country and even exported. They are one of the few minakar families who work with this alloy. They traditionally worked with gold till the Gold Control Act was introduced in India. The mix of the alloy is a closely guarded family secret. In Delhi and Jaipur two forms of enamelling are popular: the champlevé style where the metal is engraved to create depressions into which colour is embedded; and the repoussé form in which a thin metal plate is embossed over a prefabricated die. This die has the design etched on one of its sides. The metal plate is moulded over the die by stamping on it. Once this is done the grooves are etched with the help of a metal stylus and the colours filled into the areas created. A metal stylus with its front flattened and shaped like a wedge is used for carving and engraving the base metal. The mina is powdered before use with a grinder and is dispersed with a metal spatula into the palette. Long pointed needles of different thicknesses are used for applying the colour on the carved or moulded metal plate. Blocks are used both for engraving and for embossing the metal plate. The kiln is an essential part of the process and can range from a relatively modern to a homemade one. Tools for the final cleaning of the piece include an iron needle and a file. The design vocabulary in minakari is vast and includes many patterns. Creepers and vines, flowers (particularly the lotus), birds (especially the parrot and the peacock), paisleys, geometric patterns, and calligraphy are some of the more commonly used designs. The colours used are red, green, white, and blue. In its contemporary form, minakari is not confined to traditional jewellery but ranges into more 'modern' products, often with a copper base, including bowls, ashtrays, key chains, vases, spoons, figures of deities, and wall pieces.
|
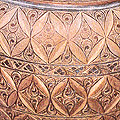
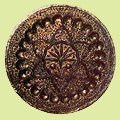
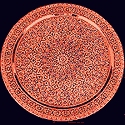
INTRODUCTION Enamelling is the process of firing a vitreous, glass-like coating on to a metallic base. In India, the tradition is centuries old and has been used for creating both precious art objects as well as utilitarian items. Most often, enamelling has been, and is, used to enrich and decorate jewellery. Commonly known as minakari, enamelling is traditionally done in greens, reds, blues, and whites on gold (and silver), as its lustre brings out the colour(s) of the enamel(s). It is often combined with other techniques such as kundan, filigree, and bead-work, resulting in exquisite pieces of jewellery. In the past, enamelling was practised in many centres in India, with each region specialising in its own particular style and technique. In Lucknow, the minakars specialised in blue and green enamelling on silver, while in Banaras the dusky rose-pink or the gulabi mina was the dominant colour. The craft was also practised in Kangra, Kashmir, and Bhawalpur. It was, however, extremely vibrant in Jaipur (Rajasthan) and in Delhi, and these two centres continue to create exquisite pieces of minakari work till today. It was only after the introduction of the Gold Control Act in India - which compelled the minakars to look for a base material other than gold - that copper was introduced. Copper is now used as base material for enamelling in a range of handicraft products, including plates, ashtrays, and decorative mirrors. ABOUT ENAMELS There are various kinds of enamels. An important distinction between different kinds of enamels is determined by the use or absence of lead in the enamel. Lead enamels allow glass to melt at lower temperatures and yield brighter colours; however, they are not food safe. Enamels can also be classified according to the properties of the colours. Included are,
In India, enamel is available in vitreous and industrial form. Industrial enamel comes in all colours but is usually opaque and is commonly used for hospital and industrial equipment, and pots and pans. It is also cheaper. Vitreous colours are both opaque and transparent. PRINCIPAL ENAMELLING TECHNIQUES Principal enamelling techniques include the following: BASSE-TAILLE: In this, the metal surface is carved in varying depths of low relief using etching, engraving, chasing, or other techniques. The low relief surface is covered with transparent enamel so that the design is revealed through it. Several thin layers of transparent enamels are then fired over this base, giving the enamelled object a brilliant tonal quality. CHAMPLEVة: In this, portions of the surface of the metal are cut away, creating troughs and hollows, separated by raised lines of metal that form the outline of the design. The hollows are then filled in with colours. CLOISONNE: In this, thin strips or wires of copper are soldered/fastened on to the base metal in order to produce a closed cell (cloison) design. These cells are then filled with enamel colours and fired. Each colour stays within the enclosed cell and does not diffuse to other spaces. Once the piece is completed, the cloisons are only visible as a fine network within the enamel. PLIQUE A JOUR: In this, metal strips or individual wires are used to create the design, and are often used to create the structure of the object itself, such as a vessel or a piece of jewellery. These wires or strips are soldered to each other, rather than to a base metal, thus creating a network of metal for the enamellist to work upon. Here the enamel does not have a backing but is held together by the metal structure. The final results are stunning.ENAMELLING ON COPPER: A STEP BY STEP PROCESS Photographs and process outline: The Enamelist Society A word of caution - if you are doing enamelling for the first time it is suggested you do a short orientation course with a trained enamellist. The Enamelist Society, among others, runs courses for beginners in both Delhi and Mumbai. In copper enamelling, as in jewellery, a powdered coloured glass called enamel is applied to the copper base. The whole piece is then subjected to high levels of heat and as the glass enamel melts, its thermal expansion matches the expansion of copper, allowing it not only to fuse to the metal, but also to remain firmly attached to it when it cools down again. MATERIALS REQUIRED
STORAGE OF ENAMELS Although enamel is manufactured in a chunk form, the type most commonly used is ground so that it resembles fine sand. Many enamellists wash or sift the ground enamel to sort it into the desired grain size. Colours should be stored in tight containers to protect from dust and oxidation, preferably of glass or plastic. APPLICATION METHODS Remember that enamel colours have to be ground finely and graded by sieving through various gauges of sieves, before use. There are two basic ways enamel colours are applied on the metal surfaces. |
|

 |
DUSTING: Dry colours can be dusted through sieves onto the base metal. Usually a gum and water solution is applied on the base so that the dry colours do not blow away. Enamels are available in forms other than just powders. Colour sticks, threads, and little chunks or crystals of colour, for example, are often popular and can sometimes be placed on the base to give a different effect. WET CHARGING: Wet colours are those that can be mixed with water and a small amount of gum and applied with regular sable brushes. Ceramic oils and glycerine can also be used as a mixer. |
|
FIRING OF ENAMELS Firing is the most critical part of enamelling. Under-firing gives a grainy appearance to the enamel and the enamel does not get fixed to the metal surface properly. Over-firing often discolours the enamel. Kilns should be preheated to the required temperatures. DISPOSAL OF MATERIALS It is important to neutralize the sulphuric acid solution with boric acid before disposing it. The enamel colours should not be disposed off down the drain pipe - as over time they will corrode the pipes. Instead collect the waste, wrap it in paper and then dispose it. |
|
| 1. |  |
Remove all surface impurities from the copper piece (20-22 gauge thickness) by putting the copper piece into a preheated kiln. Use tongs for handling the piece. |
| 2. |  |
Leave the piece in the kiln for a minute or two so that the impurities are burnt out. This process is called annealing. |
| 3. |  |
Remove the copper piece from the kiln and put into a water bath to cool the piece and remove the burnt ash-residue that you will find on the surface of the piece.. |
| 4. |  |
Take out the copper piece from the water, using tongs, and dip it into a solution of sulphuric acid and water made in a ratio of 1:7. |
| 5. |  |
Leave the copper piece for a few minutes in this solution. This helps remove the remaining grease and impurities from the copper piece. |
| 6. |  |
Remove the piece from the sulphuric acid solution, using tongs, and dip into the water bath again, ensuring that the acid solution does not drip anywhere. A word of caution - remember the acid solution is strong and can burn you. |
| 7. |  |
Scrub the piece well on both sides with a brush. Use vim if necessary. The copper piece should glisten. |
| 8. |  |
Do not handle the piece directly with bare hands - instead hold the piece from the sides - the fingers or thumb should not rest on the surface of the piece, even accidentally, as this leaves residue oil on the copper piece and affects the enamelling. |
| 9. |  |
Wash well in running water removing all traces of the cleaning agent used as well as the surface grease and all other impurities. |
| 10. |  |
The copper piece should glisten. |
| 11. |  |
Next, a ground coat of wet enamel is applied to one side of the copper piece. The enamel solution should be slightly watery and can be dabbed on with a brush. |
| 12. |  |
Cover the full piece properly and allow the enamel to dry completely. Wipe off all extra enamel that may have gone to the other side. |
| 13. |  |
Fire in a preheated kiln for 1-11/2 minutes. Firing the ground coat at 830 degrees celsius envelopes the metal in glass. This process is known as counter enamelling. |
| 14. |  |
If the enamel continues to be grainy it usually means it is under fired and needs to be further fired. If the piece is warped then immediately put it under a weight - it will straighten out. Alternatively drop it on the floor and stamp on it. |
| 15. |  |
Counter enamelling is done so that the tension of the piece is the same on both sides of the metal and will eventually ensure that the metal does not warp or the enamel crack over time. The metal and the enamel expand and contract at different rates when heated, counter enamelling to some extent takes care of this. |
| 16. |  |
Cover the second side with the opaque enamel solution of the colour that you want. |
| 17. |  |
Cover the piece completely. |
| 18. |  |
After ensuring that the entire side is covered with the enamel solution, knock the piece on the side with any hard object like a pencil. This ensures that the enamel solution spreads uniformly. |
| 19. |  |
Allow the enamel to dry. Now you could scratch a design on the dried coloured enamel solution, using a sharp well pointed pen or marker. The line impressions should be deep enough to expose the copper base. |
| 20. |  |
Fire for 1-2 minutes. |
| 21. |  |
The firing burns the exposed copper lines and turns them black, while at the same time melting and fusing the remaining enamel to the base. This is technique is known as sgraphito. |
| 22. |  |
If required excess enamel can be removed using a stone file. |
| 23. | |
The copper piece can be further worked upon by applying colour in various ways. In this case wet enamel with a paint brush. |
| 24. | |
Another way is to cut a stencil in an desired pattern and dust the colour over it. To ensure that the colour does not blow away the piece is first sprayed with a solution of tarragon gum and water. The colour then settles on the exposed piece. |
| 25. |  |
The stencil is lifted from the copper piece and the piece fired after drying. |
Meghwal embroidery is traditional craft practiced in the Kolayat tehsil and Bajju village of Bikaner district. Tools such as needle, thread and scissors are used for the crafting process. Traditional objects such as soulder cloth for the groom called malir, groom's ceremonial scarf, worn over a safa called bokani, ceremonial square cloth or rumal, groom's waistband or kadbandhan, blouse worn by married women or kanchali, bag gifted to the groom or khalechi, money belt or nolee, small purse or batua, bag for dowry items or thailo are produced under this craft form.
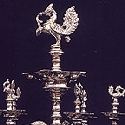
A variety of lamps are used in Tamil Nadu for rituals both in homes and temples. The deepam or lamp is the most significant of the metalware made and the type of lamps include aarthi/votive lamps, deepalakshmi, hand lamps and chain lamps. Standing lamps called kuthu-vilakku and have a round slim-wicked bowl standing on a pedestal; there can be many tiers to this lamp and it is used at all ceremonial occasions. The most common decoration on top of the kuthu-vilakku is the hamsa/ mythical swan. Aarthi or votive lamps are hand-held with the handle often carved in the shape of a cobra, fish, peacock or monkey. Deepalakshmi or paavai-vilakku is a temple lamp with a female figure holding a shallow bowl for the wicks. Hand-lamps lack have deeper bowls and the backs have religious symbols, such as goddess Lakshmi with elephants on either side or parrot-shapes on the rim. Christians and Muslims have the shapes of the cross and the crescent moon, respectively, on the lamps. Hanging lamps have elaborately decorated bowls suspended with chains. The lamp usually has figures of Gajalakshmi or Ganesha, and the chains have female figures at regular intervals. Almost all the metals are use to make these lamps, including precious metals like gold and silver. They emphasise the utilitarian and aesthetic aspect of the craft. The Shilpa Shastras, the ancient treatise on sculpture has a complete section on the necessary characteristics and production of lamps.

A variety of lamps are used in Tamil Nadu for rituals both in homes and temples. The deepam or lamp is the most significant of the metalware made and the type of lamps include aarthi/votive lamps, deepalakshmi, hand lamps and chain lamps. Standing lamps called kuthu-vilakku and have a round slim-wicked bowl standing on a pedestal; there can be many tiers to this lamp and it is used at all ceremonial occasions. The most common decoration on top of the kuthu-vilakku is the hamsa/ mythical swan. Aarthi or votive lamps are hand-held with the handle often carved in the shape of a cobra, fish, peacock or monkey. Deepalakshmi or paavai-vilakku is a temple lamp with a female figure holding a shallow bowl for the wicks. Hand-lamps lack have deeper bowls and the backs have religious symbols, such as goddess Lakshmi with elephants on either side or parrot-shapes on the rim. Christians and Muslims have the shapes of the cross and the crescent moon, respectively, on the lamps. Hanging lamps have elaborately decorated bowls suspended with chains. The lamp usually has figures of Gajalakshmi or Ganesha, and the chains have female figures at regular intervals. Almost all the metals are use to make these lamps, including precious metals like gold and silver. They emphasise the utilitarian and aesthetic aspect of the craft. The Shilpa Shastras, the ancient treatise on sculpture has a complete section on the necessary characteristics and production of lamps.
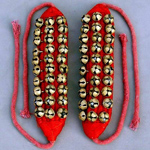
800 to 900 families are engaged in making the bells not only for Hindu temples, animal bells but also the anklet bells/Gungroos worn by dancers across India. A traditional occupation the craftspeople also cast religious idols, lamps for prayer and other metal items. A hereditary profession, they use the most basic of tools - Batta Bidinia (Grinder) Reta (File), Dabar, Farma (Die), Nihai, Sandyasi (Tongs), Pahiya (Circles), Pankhia (Fan for stoking), Cheni (Chisel), Hathida, Para, Gharia, Kothali, Suhaga, Kauli, Patta reti, Kharat, Badami Reti. The Silli (slab) comes from Mathura and is more expensive. These tools are made by the local lohar/ironsmith.
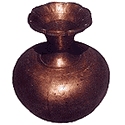
A dome shaped lid held on stem like base is a common brass article to be found in every Assamese household. The Hajo's in the Kamrup district, the Baniakuchi in Barpeta district and the Sarthebari are engaged in the art of metal casting. The metal utensils are used during the marriage ceremonies and to hold religious offerings. The betel nut and leaves, the economically and culturally significant crop of the region is also placed in the metal utensils and offered to guests when they enter the house. Sarai- a common ceremonial vessel is made in various different pieces which are assembled by either brazing or pressing the sheet over mould. The other utensils include water pots, bowls, and dishes with stand. The process of shaping and beating the metal is usually followed by embossing and cut work follows. Another interesting feature of the Assamese surai is that it is always sold by the size of its diameter instead of its weight.
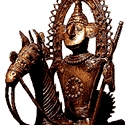
The tradition of lost wax bronze casting is believed to have been brought to Chamba by immigrant Kashmiri artisans who found patronage at the courts of the Pahari Kings; with time, local stylistic elements were introduced into the crafts. The craftsmen specialized in making idols and the metal used is usually an alloy of brass with 65%copper and 35% zinc. Silver is also included in the casting in a proportion of 10gm of silver to 1 gm of copper; it is also occasionally used to inlay a figurine's eyes. Traditional metal statues can be seen enshrined at a number of temples in the region including the Lakshmi Narayan Temple, temple of Bansi Gopal, the Hari Rai Temple, Chamba and others. Craftsmen can be seen making the Mohra - votive masks, Idols, Figurines and Bells. Their tools are basic being Soldering iron, Sandpaper, Buffing machines
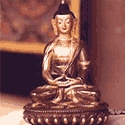
Across Sikkim, Buddhist monasteries with beautiful brass and bronze metal images of Lord Buddha and other objects of ceremonial use and reverence such as small bowls, plates, and statues can be found. These items are made by local artisans, concentrated in and around Gangtok.
The uniqueness of metal casting in Sikkim holds to the fact that a prototype model is created which is perfected in features and expression, further hand carved. The popular metal casted objects are Buddhist figurines or more famously known as Ku, usually made in copper using lost wax casting. The production is concentrated in Sikkim’s eastern district, Rumtek.
Unlike the figurines produced in rest of India these objects have distinct Mongolian features and motifs. Once the prototype model is perfected a wax mould for the same is created to produce several wax models for casting. Several tools are used in the production such as knives, divider, hammer, chisel, carving tools, stones and hacksaw blade.
The process starts with developing a flexible and detailed rubber mould which is further used to create the wax mould. A combination of cow dung, sawdust, yellow mud is coated on the wax mould with an opening created on the top. As the mould is fired, the wax melts and through the opening, molten metal is poured and left to cool. The metal figurine is revealed as the outer mud layer is separated. The final step involves filling, polishing and decorating the figurines with gold and silver colour.

The brassware craft of Andhra Pradesh has been in existence for about 1,300 years. The sheet metal work in brass and silver from Pembarthi and Warangal is known for its leaf and flower motifs. The designs are traditional and innovative and the products are both utilitarian and ornamental. A very popular motif is that of a stylised goose. The articles made include pots, flower vases, lamp stands, panels, napkin rings, curtain rings, paper weights, and door handles. The well-known coin metal items from the city of Hyderabad are crafted from brass scrap. The scrap is moulded and pressed in the shape of coins and other forms as required. These items are then given a silver coating. The products include ice tongs, cutlery, and a larger range of utility items.

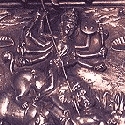
Metal crafting in Bangladesh is an ancient tradition with the earliest object, a punch-marked coin, having been made in the first century BC at Wari-bateswar, Narsinghdi. Based on traditional knowledge and the inherent skills of the artisans the craft attained a high standard. Artisans over the years have produced an amazing range of cast and worked objects in metal, from temple-icons made by the lost-wax process to ornamental studs, like the one Nawab Sirajuddoulah wore during darbar (now in the Victoria and Albert Museum, London). However, the most commonly crafted metal products were and continue to be vessels and utensils, in numerous shapes and sizes. These objects of daily use combine aesthetics with form and function to meet the everyday needs of their users. Metals used in crafting have traditionally been copper, bronze (copper and tin alloy), brass (copper and zinc alloy), bell (tin and copper alloy) gold, silver, iron, panchaloha (literally, five metals, an alloy of copper, brass, lead, silver, gold) and ashtadhatu (alloy of silver, gold, copper, zinc, lead, tin, iron, mercury). In Bangladesh most of the commonly used household products are made from brass, bell metal or copper - Cooking pots, pitchers, plates, tumblers and bowls are made in diverse shapes and sizes. A variety of other products like tableware, tabletop and wall hangings are often made out of sheet metal by alternatively hitting and hammering the metal. The raw material is usually obtained from various sources - through smelting minerals; by melting old scrap or through the purchase of sheet metal. Since they need daily cleansing and scouring, the utensils crafted are usually of simple, graceful forms with hammered or incised patterns rather than raised decorations. However, other utilitarian articles like betel nut cutters, rice measures, lamps, ceremonial stools and kulas (winnows) are very often beautifully decorated in punched or engraved patterns of linear and floral motifs and in dots displayed in a variety of arrangements. The artisans employ a number of techniques to craft the metal – including among others shaping, casting- both solid and hollow, engraving, enamelling and repousse work.
Delhi is an old centre for metal work. Generations of metal workers practise their skill here. This craft has been handed down in families and survives mainly in the narrow lanes of the old city of Delhi. Brass, copper and silver sheets are all used in crafting the articles. Sketches of the objects are first made on paper and then transferred on to the metal sheets. All the products are almost entirely handmade, the metal being beaten into shape with a hammer. The turning process is done on a hand-lathe and the soldering requires a metal alloy, which is prepared by the artisans. The various tools used are also made by the metal workers themselves. Only the final polishing or buffing is done by machine. The product range includes utensils and art ware, particularly table tops, wall plaques and plates, planters, and hanging lamps. Ornamentation of metal objects can be in the form of engraving, which is light impression design work on metal. A blunt chisel is used for this and only trace imprints of the design are done on the metal surface. This is commonly found in metal lamps where the design is chased on the article and then perforations are made in the desired pattern for the tracery to emerge. Enamelling is another common form of ornamentation.
The Norbulinka Institute, set up in Dharamsala for the preservation of Tibet's cultural traditions, a centre has been established to provide training in the art of both sheet metal and metal casting; it is the combined use of these techniques that distinguishes Tibetan metal work. A range of statues are made to cater to a variety of requirements-large statues are made for the monasteries while smaller statues are made for sale to individuals. The large statues are made as individual cast parts that are eventually joined by soldering or brazing. The statue is fininshed through the mercury gilding process, usually executed under the supervision of a master craftsman. The occasional addition of inlaid precious stones to the bronze statue is motivated by the belief that the statue' s spiritual presence is increased by the value of the material used. The training received by the craftsmen includes the development and refinement of drawing skills and a knowledge of the proportion system and measurements laid down in canonical texts.

Gujarat has a wide range of brass objects made by the kansara community. The storage and chests used by the kathi community in Saurashtra are known as dhablo or katordan. Small containers with engraved designs in brass and beaten copper are used to store jewels, dates, nuts, and turbans. The nut-crackers have animal, bird, and floral motifs; the other items made are kohl containers, pen boxes, foot scrapers with bells, perfume bottles, and cosmetic containers. The main centres of metal ware in Gujarat are Jamnagar, Wadhwan, Visnagar, and Sihor. Large temple bells are a speciality of Sihor and the famous temple bell at Girnar Hill weighing 240 kg was made here. Dabhoi is noted for large temple drums made of copper. Visnagar is famous for repoussé work. Brass furniture is a speciality of this area. Low stool, tables and low armchairs are some of the highly-carved items of furniture made here. Trellis work and statuary in brass are found in palaces and temples in this area. The highly intricate workmanship of the artisans of Kutch and Rajkot expresses itself in the art of aluminium engraving. The article to be engraved is first moulded to a required shape and size; it is then filled with kil and the outlines of the design are marked on its surface. The actual engraving is done with the help of a chisel The article is then heated to remove the kil. The rough inner surface is smoothened and washed with acid. Glittering trays, surahis, cups, and shields, all with brilliant designs, are crafted. Engraved silver articles of Gujarat are a speciality. The articles to be engraved are moulded into required sizes and shapes. The article is then filled with a kind of mud and the outlines of the designs to the worked in are marked on the surface of the vessel. Engraving is done with the help of engraving tools and a hammer. The item is then washed with acid to get a shine. Trays, photo frames, cups, shields, surahis, and paandans are some of the items produced.
Several techniques are used to create metal ware - old scrap is melted and sheer metal is also used. Shaping is done while heating or pouring molten metal into a mould. The turning process on a lathe smoothens the article by scraping and brushing. Soldering is done by using metal-alloy which is prepared by the artisan, followed by vigorous hand-polishing. Attractive colour combinations and metal textures are created by using techniques of inlay, overlay and appliqué. In Jagadhari, Yamunanagar; Jind; Thathera Mohalla in Rewari traditional brass utensils are made like the Tokni-water pot, Degchi - cooking vessel, Nand-cylindrical containers, Parat-circular tray, Lota-water pot, Balti-bucket, Diya-oil lamps and toys Toys. Following the technique of die-pressing and manually cold forging brass sheet the craftspeople use brass ingots as their raw material. This very organized production is done in an assembly line manner with specialized craftsmen doing that part of the production in which they are expert. For instance one workshop will sandcast, the next will manually shear the metal into the shapes required and die-press the sheets into hemisphers. At a third workshop the hemispheres will be manually worked with huge mallets till the desired shape is achieved. The joints and the neck are gas welded and he mouth is beaded. The products are hand polished with mud and tamarind d sandpapered. Finally,the walls are manually beaten with polished hammerheads to reinforce the sheet metal.
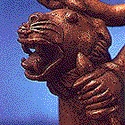
In the stark and highly-defined line of metal, the sculptures from Karnataka create a look that distinguishes them from others. Traditionally, 'panchaloha' or the alloy of five metals --- copper, brass, white lead, gold, and silver --- was used for casting in bronze. Today, to minimise the cost of production, the alloy consists of only the first three metals. Two variants of metal sculpture practised in Karnataka are the sheet-metal craft and the bell-metal craft. In the first, the artisan embosses designs on a sheet of brass or copper. In the second, different kinds of lamps are designed in bell-metal. Individual skill and dexterity plays an important role in the final expression of the object, irrespective of the method being used. The important metal ware centres of Karnataka are Bangalore, Nagamandala, Sravan Belgola in Hassan district, and Udipi, Buntwal, and Karkal in Mangalore district. Karkal is an old Jain centre and the craftspersons here specialise in making rare Jain icons. Mangalore is an important bell-metal centre and the items made include milk containers called mili and bowls called gurdano. Udipi is famous for small images and ritualistic items.
This is essentially a tribal craft practised in Bastar, Pranpur, Datia, and Sagar. The cire- perdue or lost wax process is used for the casting. The clay core is retained within the metal covering and lends weight and strength to the product in spite of the thinness of the metal layer. The main products include figures of tribal deities such as Mahadeo, Kali, Kalikankalin, Satbehen, Thakur dev, Sitalamata, Gangadei, Semiriamata, Danteswari, Birabai, Agwanidevi, Burimai, Nandia, and Nag. The style of the products is folk and the products made are votive lamps, anklets, and turais (tribal bugles).
Copper ware is a traditional craft of Maharashtra, although oxidised copper ware is a recent innovation. The craft is practised in Ambernath, Thana, Kalyan, and Nasik. Among the wide range of copper articles produced at the units here are perforated chandeliers and lamp stands, ashtrays, glass holders, paper cutters, pin cushions, and trays. Articles such as decorative door handles, key chains, cuff links, and moulded figures of Trimurti (the Hindu trinity of Shiva, Vishnu, and Brahma) are now being made, mostly for tourists and for export markets. Maharashtra, also makes brass and copper vessels in traditional shapes. The art of bidri, silver inlay on a metal alloy, came to Maharashtra with artisans who migrated from Bidar, in Andhra Pradesh, to Aurangabad many years ago. The craft tradition continues with the major products being decorative wall plaques. In pilgrimage centres like Nasik, initially only ritual objects --- idols of gods and kumkum boxes --- were crafted in silver. With growing demand, other articles such as paandans, gulabdans, attardans, and bowls and trays have been added to the list. In Kolhapur as well there are a few units making silver ware products.